Upcycle an old thrifted frame into a Halloween masterpiece

It’s officially spooky season!
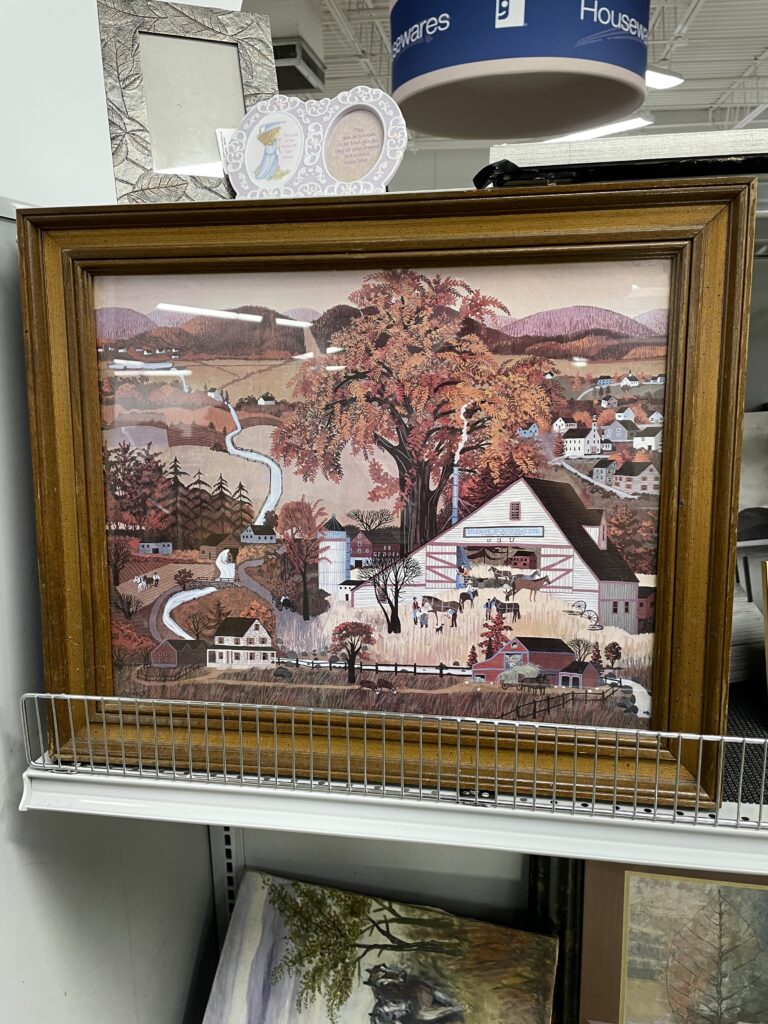
You don’t have to break the bank to join in the fun of decorating for Halloween. A trip to Goodwill — and possibly the craft store — plus a little creativity goes a long way to upcycle an old picture into a festive piece this season.
On your next Goodwill shopping trip, look in the housewares department for an old painting. A landscape painting lends itself to lots of options for creativity. But other paintings with buildings, people or animals could be a great start also. The idea is to add Halloween elements — think ghosts, pumpkins, dark skies, black cats, candles and candle wax — to make the painting have a spooky vibe.
Here is a tutorial to help you make your own Halloween masterpiece.
Step one: Remove the backing
Many old framed paintings have a paper backing, which is easy to puncture with a flathead screwdriver. Using the screwdriver, remove the backing from the frame and lift the metal brackets holding it in place. Then you can easily remove the painting from the frame.
Step two: Clean the frame
You’ll want to clean the frame, glass and painting. Many donated frames collect dust, so it’s best to wipe them down so you have a clean surface to work with.
Step three: Paint the frame
Using acrylic paint and a sponge brush from a craft store — or in your arsenal of supplies at home — paint the frame. The style is up to you. Use lots of paint or multiple coats to completely cover the original frame, or use a lighter hand to let some wood show through.

Step four: Add ghosts and pumpkins
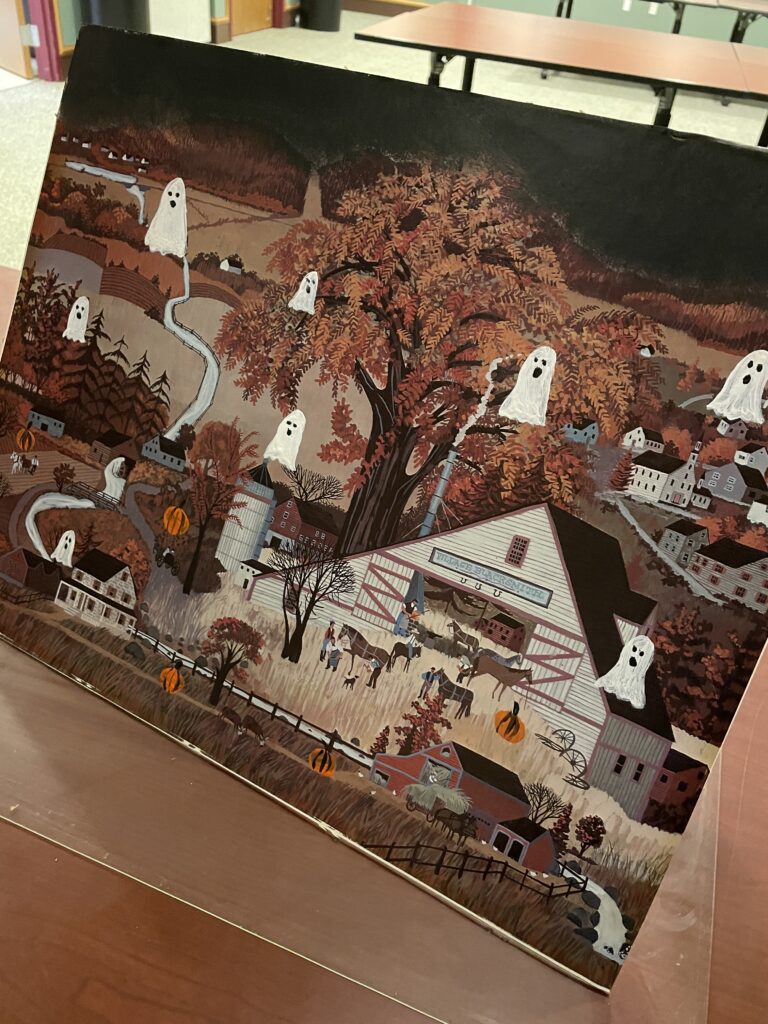
Depending on the painting you choose, you can add pumpkins or ghosts, or a mix of both. For those feeling super artsy, ghost cats or dogs are a fun touch. Add in the elements where you think they work best. There is no wrong way to do this.
Step five: Add a spooky sky
If your painting has a sky like the one here, use black paint to add an extra spooky element. Sponge brushes work great for this, so the color is still a tiny bit transparent.

Step six: Add a flickering candle
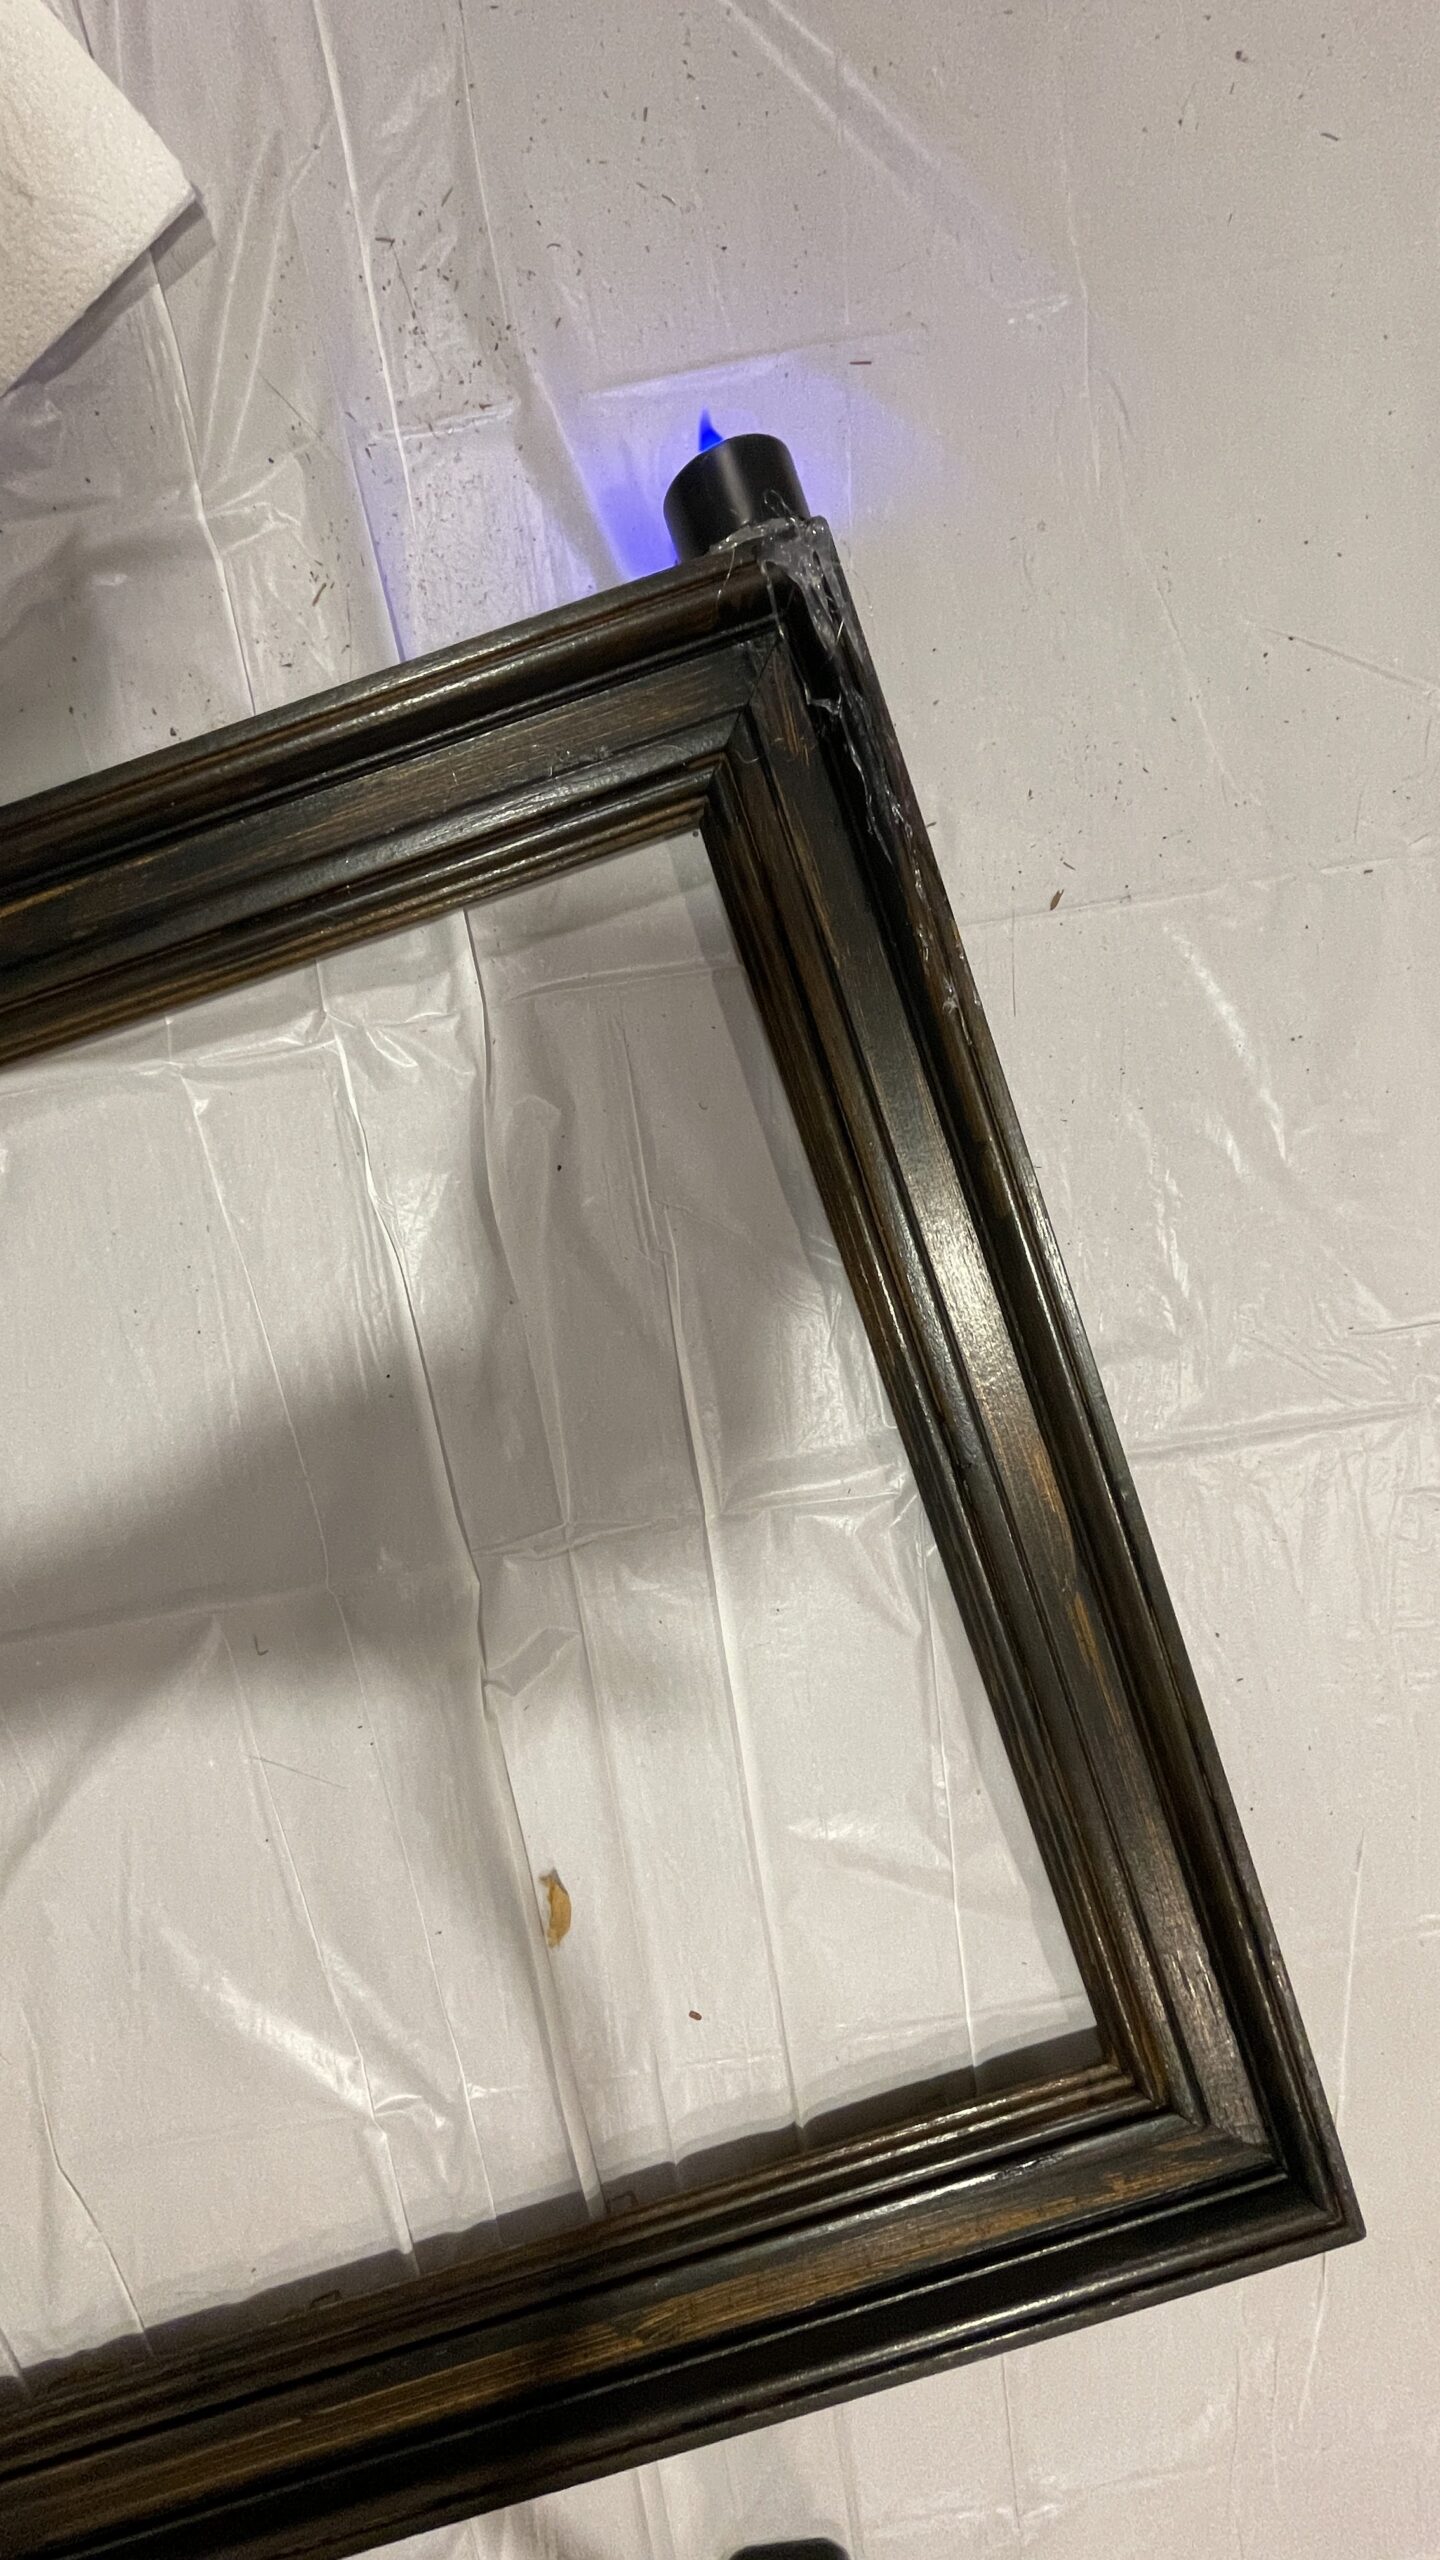
To take this project to the next level, add a flickering candle to the top corner. The best way to do this is using a hot glue gun, which will be useful in the next step also.
Step seven: Use hot glue to look like dripping candle wax
Using the hot glue gun, run lines of glue down the frame, layering them to look like dripping candle wax.

Step eight: Reassemble the frame
After the hot glue dries, you can reassemble the frame. Use the screwdriver to flatten the brackets into place.
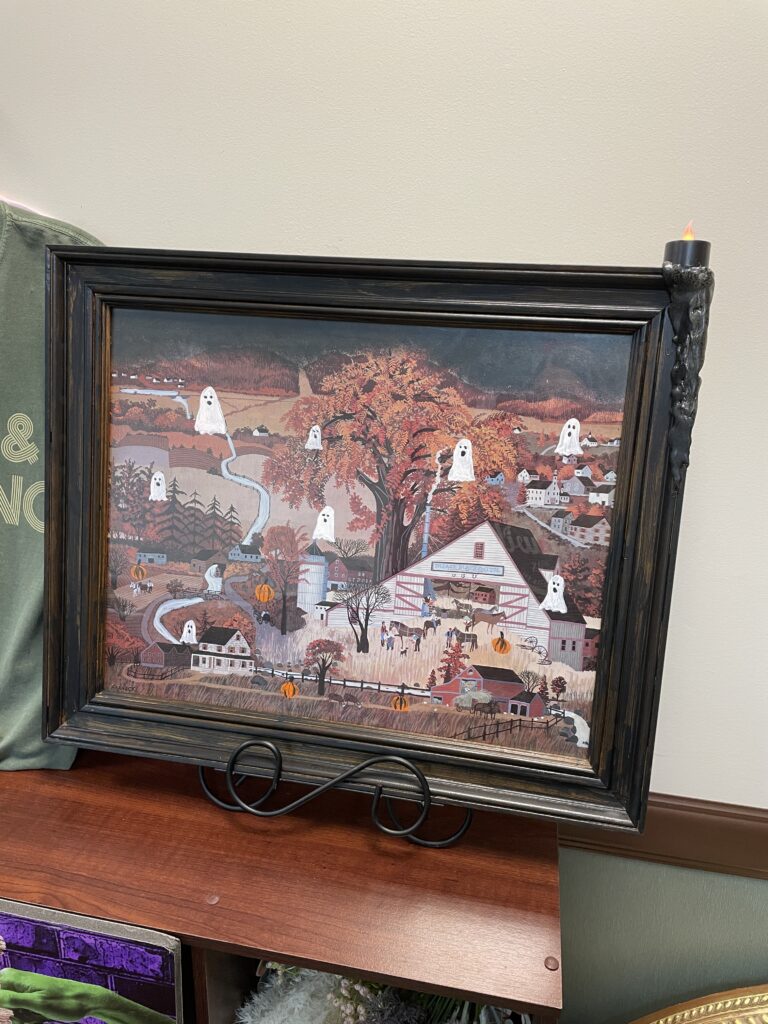
Step nine: Paint the “candle wax”
The final step is to paint the hot glue that looks like candle wax. Using a sponge brush is an easy and fast way to paint this.
Optional
If needed, add a new bracket to the back of the frame before hanging.
Total cost of this piece:
The painting was purchased for $13.01 from the Foxboro Goodwill at 7257 Fulton Dr. NW in Jackson Township. The craft supplies, including a six-pack of flickering lights, paintbrushes and three bottles of paint, totaled $10.18 form Michaels. The total cost was $23.19.
About the author: Kelsey Davis is the Digital Marketing & Communications Specialist at Goodwill Industries of Greater Cleveland & East Central Ohio, Inc.